


Ever wondered what that soft, dreamy blur you see in the background of a photo or film is? The type of shot where only the subject is in sharp focus, and the lights have a magical, glowing look that makes everything feel cinematic. That’s the bokeh effect, and it’s all thanks to a shallow depth of field, where just a small part of the image is sharp, and the rest melts away.
Today, we’re diving into what bokeh is, how it works, and how you can use it in your work to create a more immersive, cinematic experience.
Bokeh isn’t just eye candy either — it sets the mood. It helps isolate your subject, making them pop while the rest of the frame fades into a soft, cinematic backdrop. That dreamy look can add emotion, warmth, or a sense of intimacy to your video. Whether you’re shooting a romantic close-up, a moody night scene, or just trying to add a bit of polish, bokeh brings a visual style that feels intentional, professional, and seriously engaging.
Why are bokeh effects used in video editing and cinematography?
The bokeh effect is a go-to tool in cinematography for creating mood, guiding focus, and adding visual depth. Directors and DPs use it to isolate subjects, soften backgrounds, and draw the viewer’s eye exactly where they want it. In editing, while you can’t “add” true bokeh if it wasn’t captured in-camera, editors can enhance it with color grading, vignettes, or subtle blur effects to push that dreamy, immersive feel even further.
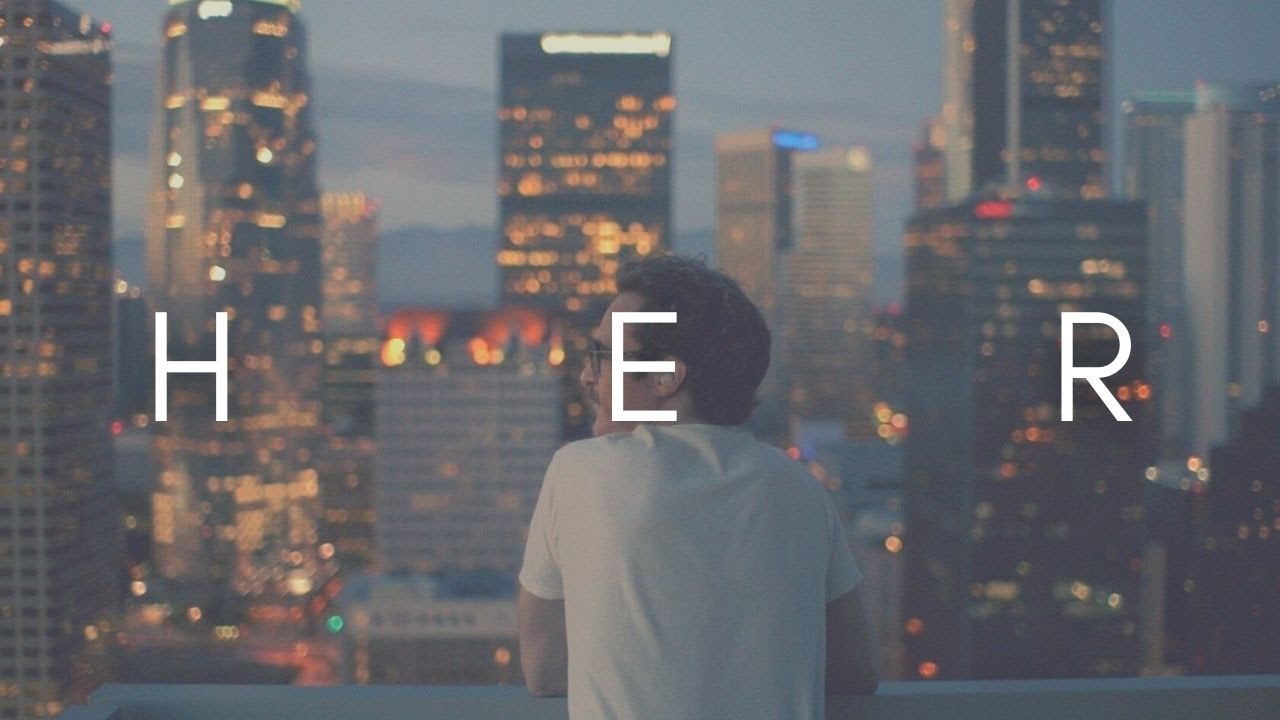
You see bokeh everywhere in classic and modern cinema. In Her (2013), director Spike Jonze uses bokeh to create an intimate, futuristic softness that mirrors the emotional tone of the film, especially in the night scenes filled with glowing city lights.
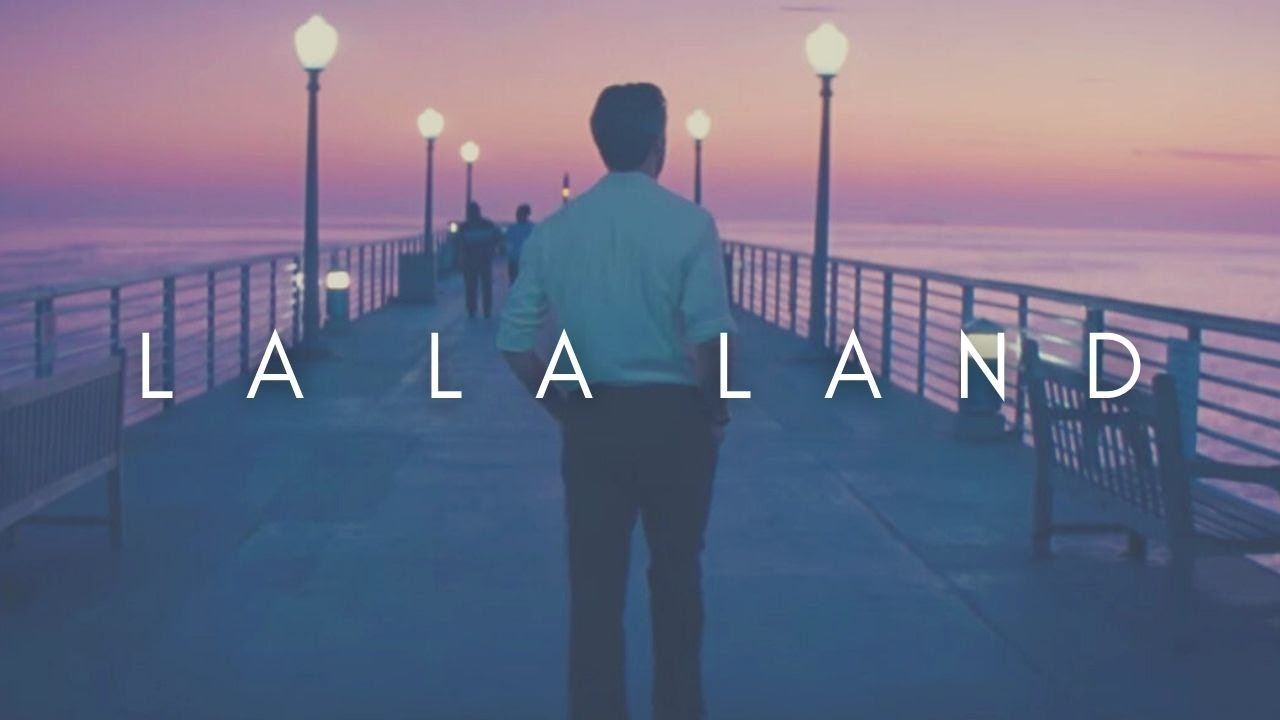
Meanwhile, La La Land (2016) uses it like a visual signature, turning LA’s cityscape into a blurred sea of color and light during romantic moments.
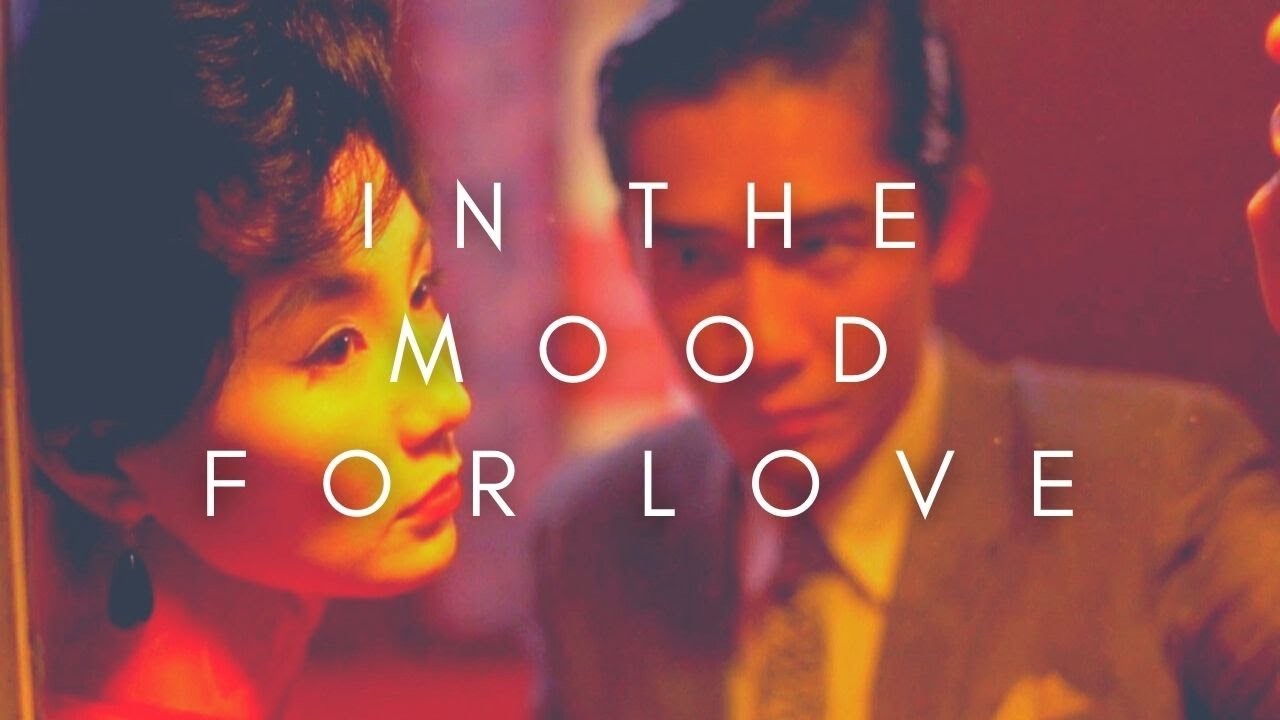
Another standout example is In the Mood for Love (2000) by Wong Kar-wai, where soft focus, shadows, and blurred lights are used to evoke longing, mystery, and emotional distance — proof that bokeh isn’t just beautiful, it’s storytelling in disguise.
How to capture bokeh footage
The trick to capturing great bokeh effects is to understand the various factors that all play a key role in creating that dreamy blur. Here’s what you need to know.
Lighting tricks
Bokeh loves lights. Point light sources — like string lights, car headlights, candles, or neon signs — work best. Place them in the background and slightly out of focus to create those signature soft orbs. For extra pop, shoot during golden hour or use practical lights (lamps, bulbs, etc.) in the scene. Backlighting or side-lighting your subject can help separate them from the background, making the bokeh stand out even more.
Best bokeh lenses
Fast prime lenses are your best friend here. You want to look for lenses with wide apertures like f/1.2, f/1.4, or f/1.8 — these let in more light and create a much shallower depth of field, which is key for bokeh. Popular options include the 50mm f/1.8 (aka the “nifty fifty”) or an 85mm f/1.4 for portraits. Also, lenses with more aperture blades will tend to produce smoother, rounder bokeh.
Shutter speed
Shutter speed doesn’t directly affect bokeh, but it does play a role in your overall exposure. You want to keep it balanced with your ISO and aperture. If you’re filming video, aim for the 180-degree shutter rule (shutter speed = double your frame rate). For photos, just make sure it’s not too slow, unless you want some motion blur.
Aperture
This is the big one, as you may have guessed from the advice on lenses. The wider the aperture (lower the f-number), the shallower the depth of field, and the creamier the bokeh. Stick to f/2.8 or lower to really see the effect. Just remember to be careful with focus — when the depth of field is that shallow, even a slight shift can throw your subject out of focus.
Positioning
The key to good bokeh in photography and cinematography is to keep your subject far from the background and close to the camera. The more distance between your subject and those lights or background elements, the stronger the blur. Also, frame your shot so background light sources are visible, but not overpowering. It’s always good to play with your angles — you’d be surprised how much a small shift can change the quality of the bokeh.
Editing tips to enhance the bokeh effect
In post-production, you can’t create real bokeh from scratch, but you can crank up the “bokeh vibe”. For example, you can boost contrast slightly to make light sources pop. Or use selective blur or depth-of-field filters to soften the background more. You can even add subtle glow or light bloom effects in tools like Adobe Premiere Pro, DaVinci Resolve, or Lightroom for your photos. Just don’t overdo it — bokeh should feel natural, not forced.
How to create a bokeh effect with a smartphone
Yep, you can still get great bokeh footage with your phone. Use portrait mode on your camera, and you’ll find that it’ll simulate a shallow depth of field using software. For the best results, shoot in low light with small light sources in the background. Some apps (like Halide or ProCamera) can also give you more manual control if your phone supports it. And for editing? Apps like Snapseed or Lightroom Mobile can help soften backgrounds or enhance glow around lights to push that bokeh look further.
Creative ways to use bokeh effects in your videos
There are a number of ways you may want to utilize bokeh stock footage and templates in your video projects.
As a background
You can use bokeh footage behind titles, logos, or motion graphics to add depth without distraction. It keeps things dynamic without stealing the spotlight.
For transitions
Use pre-made bokeh transition templates to add a smooth, professional touch between scenes. They’re perfect for wedding videos, promos, or anything that needs a soft, elegant flow — no heavy editing required. Just drag, drop, and done.
To set the mood
If you drop in some slow-moving bokeh lights into your edit, then you can instantly bring warmth, romance, mystery, or a dreamy vibe to a scene. This could be perfect for seasonal videos around the holiday season.
As a texture layer
Bokeh can also be used as a texture layer. You can blend it over footage with low opacity to create a rich, atmospheric feel, especially in music videos, wedding films, or emotional montages.
In social content
Bokeh is always great for intros, reels, and background loops that need a touch of elegance or visual interest without getting too busy or distracting.
Bokeh: both art and tool
Bokeh isn’t just a technical trick — it’s a creative choice. Whether you’re capturing it in-camera with the right lens and lighting, or enhancing it in post with subtle edits, bokeh helps you shape the mood and focus of your scene. It’s one of those rare effects that’s both simple and powerful — easy to experiment with, and endlessly customizable.
So, go play. Try different lenses, play with distance, mess around with light. Don’t be afraid to push your edits a little further to find a look that feels right for your project. And if you’re looking for inspiration or ready-made assets, check out Artlist — you’ll find cinematic footage with gorgeous bokeh and editable overlays that’ll take your visuals to the next level.
Did you find this article useful?


